McFarlane Cutsoms
HOW TO TABLE OF CONTENTS!
(the HOW TO section was created from
discussions with Mark Duda: XXX Customs)
First off, I'd just like to state that everyone has their own way of doing
these things. The following is what works for me.. not to suggest that this is
the 'right' way... but the following processes are what seem to work best for
me. I will will touch on the areas which I feel are my strengths in this
hobby:
Additionally, I will provide a quick step by step guide to repainting
and customizing these action figures into the player of your choice. I will
also offer tips on painting, but you can take that for what it's worth..
Here's a real quick outline of the steps I would normally
use to make a custom:
- Bathe the whole figure in hot water and TSP (or
similar cleanser) for at least 10 minutes. Scrub with a brush if desired.
You can't over-clean these things.
- While the figures are still hot from the hot water bath, remove the heads,
arms, hands and accessories. Removal is fairly easy when the figure is warm.
Removing the helmets from the heads can be a little trickier, but it is
possible (although not always necessary) . Some helmets come off easy, some
are damn near impossible. It seems to me that the later series (6-7) are
alot easier to remove the helmets than the earlier series. The best way to
get the helmets off is to simply pry them off with a small screwdriver while
they are still warm. First remove the face mask by gently prying up at the
pegs. They usually come off fairly easily. Try not to destroy the face mask
as you will want to keep it for your 'parts box' for use with other custom
figures. Carefully scrape off the chin strap with a exacto knife. Again try
not to screw it up as chin straps are very valuble (couldn't imagine trying
to fabricate a chin strap). The helmets are usually attached by a square peg
in the center of the inside of the helmet going into a hole on the top of
the head. Gently pry upwards, switching from the back to the front and to
sides of the helmet until the glue becomes loose enough to remove the
helmet. Many times the helmet will become mis-shapen or deformed during this
process, but it can be fixed by simply putting it back into hot water. If
you fell it needs more heat to fix, you can microwave some water to make it
hotter.
- Now is the time to do any sculpting or limb alterations if desired.
(including extending the sleeves or shaving and sanding unwanted plastic)
- After the figure is to your satisfaction as far as the pose.. Prime it..
(see above)
- Paint the base coat of the uniform, skin tone, shoes, gloves, etc.... (see
painting section)
- Paint (or decal) the stripes (see painting section)
- Make, print, and seal the decals (see decaling section)
- Apply the decals (see decaling section)
- Fill holes, sand, and paint the helmet. I use bondo for filling the
unwanted holes in the helmet. Then sand with fine sandpaper (400 grit or
finer).. Then airbrush the paint on.. at least two coats.. usually three.
Paint the front and rear bumpers and the inside pads with an off white
paint. After it has COMPLETELY dried, apply the decals to the helmet, attach
the face mask and spray helmet with a high gloss clear coat... set aside
to dry
- Spray a coat of clear coat (KRYLON MATTE FINISH #1311) over the entire
figure (while the helmet is still off). Repeat as needed.
- Attach any remaining accessories (football, towels, etc...) with super
glue (gel)
- Reattach the helmet, put on the chin strap with super glue.
- Take pictures
Here are some fonts I have found usefull for nameplates and
numbers. They are free and easy to install from this website.. To install, simply click on the link, and save to a
location you can easily find again. Then just unzip to your font folder (usually
C:\Windows\Fonts). DATAFONT.COM
(Fancy>Old School)
http://www.dafont.com/theme.php?cat=104&page=1
SUPPLIES LIST:
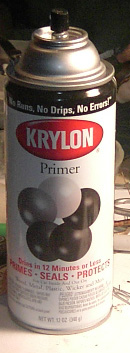
- Primer: Krylon All Purpose White Primer #1315
(available almost anywhere they sell paint)
- Paint - I use Testors model paint (flat for everything
except the helmet is gloss), but I am definetly in the minority here as
most other customizers don't recommend using testors paint.. they use
water based paints... I think I'm the only one who does these things who
uses Testors model paint. If you have visited any other sportspick
customizing web sites, you notice that almost every single one of them
advises against using testors. 95% of customizers use latex (water-based)
hobby paint and not the Testors paint... (except for the Helmets.. most
use testors gloss paint for helmets) I am not sure of the reason why most
don't use testors ... but from my experience, the only problem I have
encountered using Testors model paint would be the occasional non-drying
paint issue... I can usually solve this problem by soaking the figure in
laquer thinner and with a old brush, removing all the paint and stripping
the figure down to bare plastic and starting from scratch. But, one thing
I have noticed is that the paint drying issue is not solely because of the
Testors paint.. On most figures that I have had problems with, the primer
seems to be the root of the problem. I use the same primer as most other
customizers--- Krylon All Purpose White Primer #1315--- and usually, it
sets up and is dry to the touch in about 10 or 15 minutes. Before priming,
take care to thoroughly wash and dry the figure to remove all fingerprint
grease and other dirt. Many cleansing products will work for this... I use
TSP, but others use tire cleaner, dish soap, oven cleaner etc... If the
primer dries normally, there are usually no further paint drying issues...
but if the primer has not dried in 20 minutes or so, expect problems. By
dry, I mean when you hold the figure in your hand, there should be no
tackiness whatsoever... If the figure feels a little bit sticky.. chances
are that the primer has not adhered to the plastic and you might as well
start over now before you get frustrated later. The best way to insure
adhesion is to spray very thin multiple coats (as opposed to one thick
coat).. You don't need full coverage with the primer.. thin is best.
Especially the first coat, which should be nothing more than a 'ghost
coat'-- that is, just barely any paint at all. After the initial 'ghost
coat' has dried (at least 1/2 hour) go ahead and put on a second coat..
again making it thin, and letting it dry completely. Repeat this process
until you have the desired coverage, but not more than three or four thin
coats.. preferably not more that 2 coats. ..... The other issue with
Testors Paint is that it does not like to be handled. It will wear off
easily-- especially on sharp corners and edges like the wrinkles on these
figures. To combat this problem, I put at least three coats of paint to
the vulnerable areas, and then be sure and seal the figure with multiple
coats of sealer/clear coat. I have many figures in my collection that I
have painted with Testors paint and have not had any problems whatsoever
with the paint coming off. Of course, I do not handle them very much
(except for occasionally moving them, and dusting them off.... I would
definitely recommend against playing with any customized figure, be it
from XXX customs or any other customizer. I would probably just switch to
water based paint, but I have SOOOOO many testors colors and so much
testors paint that I cannot justify changing my paint now. plus I like the
way testors goes on a flows and I like the fact that it is a water-based
product. . But if I were to start from scratch, I would think about using
a water based hobby paint... I think wall mart has a good latex hobby
paint that alot of people use... (testors paint is availible at hobby
shops, wall mart, toy stores, and alot of drug stores... anywhere they
sell models) I would suggest that you use a latex hobby paint.
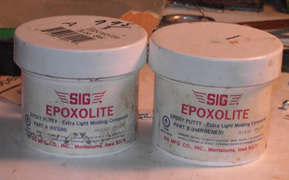
- Putty/Filler I use this stuff called "Epoxolite"
made by a company called "SIG" It is an epoxy-like resin that is
lightweight and easy to work with.. "SIG Epoxolite"
is made for filling gaps in plastic models and is available at hobby
shops- its not something you will find at target or wall mart.. its pretty
specialized.. You can also use regular bondo (for body
work on cars) but I would only use bondo for small gaps or holes... the
epoxolite I use for almost everything from filling gaps to creating long
sleeves over bare arms to creating elbow pads and wrist bands to putting
on moustaches and longer hair... almost all my figures use epoxolite in
some degree.. But I have had success using bondo for all
these uses as well... and there are many other epoxy-type products
that would probably work as well.. (by epoxy-type products, I mean
products that you mix the resin and hardener)
- A dremmell-- I use a dremmell for many things..
sanding, cutting, drilling, shaping, shaving... if you have a dremmell,
you should use it.. if not , you can get by without it. Keep in mind that
just about any task you will do using a dremmell on these figures usually
takes about a half a second. Use the dremmell very gently or your figure
will end up as a big pile of neo-plastic dust on the floor
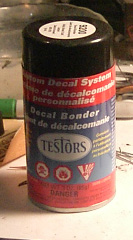
- Decals I get my decal making supplies online at: BEL
DECAL You will need both white and clear decal paper..
white for light decals over dark backgrounds (as in white--or light
colored- numbers on dark jerseys) and clear for dark decals over light
backgrounds (away uniforms.. or any color over a white or very light
background) but you will definitely need both.. you will need a
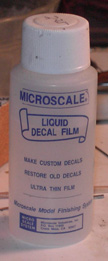
"Decal Bonder" or "Decal Film" which is a spray or
coating that needs to be applied to the decal sheet after you print up
your decals... this stuff seals the ink so it wont come off when you soak
the decal in water.. almost any clear sealer will work.. You don't really
need the stuff they sell.. you just need to seal the decal sheet... You
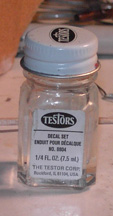
can even use the clear coat as described below the last thing you need for
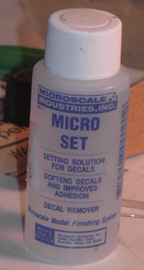
decals is something called "Decal Set" which is a product that
you paint on the surface to be decaled to help the decal to bond to the
surface.. this stuff isn't entirely mandatory, but it makes the decal
application process work a lot better.. Testors makes a decal set that is
usually available wherever they sell testors paint, or any hobby shop
should have some kind of decal set.. there are many different brands and
any one should be good.
1. 2.
2. 3.
3. 4.
4.
1.microset setting solution 2. microscale decal film (clear
coating) 3. Testors Decal bonder (Clear coating) 4. Testors Decal Set
- Brushes.. I always get cheap brushes because I always
thrash brushes. . but in any case you will need good (cheap or
expensive..., its up to you) brushes in order to cut a halfway straight
line.. Just get an assortment of small to medium brushes.
- sandpaper - 80 to 1500 grit,
- a good pair of dykes or snips,
- super glue, gel type to avoid runs and drips on the
paint
- KRYLON MATTE FINISH #1311 clearcoat/sealer
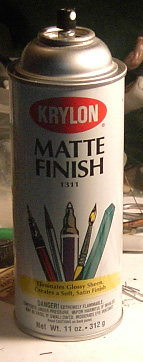
 (available almost anywhere they sell paint ... wall mart carries it) be
sure you get MATTE finish for spraying the figure when its done... This
seals the figure, sets the decals, and evens out the paints and takes away
any glossiness that your figure might have.. it really puts the finishing
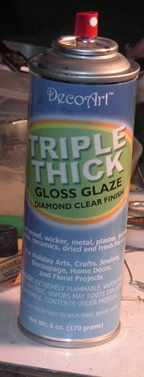
touch on your figure.... But you also need a high gloss clear coat
if you paint your own helmets (If you can get away with using a stock
helmet, you don't need the gloss, but I almost never use the stock
helmets..)
(available almost anywhere they sell paint ... wall mart carries it) be
sure you get MATTE finish for spraying the figure when its done... This
seals the figure, sets the decals, and evens out the paints and takes away
any glossiness that your figure might have.. it really puts the finishing
touch on your figure.... But you also need a high gloss clear coat
if you paint your own helmets (If you can get away with using a stock
helmet, you don't need the gloss, but I almost never use the stock
helmets..)
- X-acto Knife, Razor Blades, Hobby Knives, Files, vice grips, tweezers,
pliers, hemostats, other tools
REMOVING PARTS:
On most figures (the favre is an exception) the head,
helmet, arms, and accessories (towels, footballs, etc.) come off easily. On a lot
of the figures the legs (below the knees) come off as well, but I rarely
remove the legs. I start off by soaking the whole figure in hot water (with a
little TSP or similar cleaner).. When the figures are warmed up with hot
water, the parts come off easy... The helmets are a bit harder to remove.. The
chin strap can be removed by using a sharp screwdriver or an xacto knife...
they break easily, but if your careful you can remove them without harm...once
the chinstrap is off, soak the head/helmet in hot water again and carefully
pry off the facemask (a small screwdriver works good)- starting with the
center posts and then the side posts... they usually come off easily...then
soak the helmet again and just pry off the helmet using the small
screwdriver.. the helmets are usually attached by a square peg on the inside
of the helmet going into a square hole on the top of the head...not sure what
kind of glue they use, but it seems to loosen up with hot water.. The helmet
may become distorted or misshapen during removal, but can be fixed by soaking
them in hot water (if your tap water isn't hot enough, you can microwave some
water) ....its not all that hard as I make it sound.
REPLACING PARTS:
Getting the parts back on is a bit more difficult..
especially after you paint and have to be careful of your new paint job.. I
usally shave some of the plastic off of the male end so it goes back into the
hole easily... then I glue it.. (most of my customs do have any moving
parts).. what I usually do is put a first coat of paint on with the parts
still detached, then put the parts on, then put on a final coat of paint. I do
it this way because I usually screw up the paint a little while putting on the
parts, so I can touch up the screw ups and put on the final coat in one step.
Sometimes the parts will go back easily and if that is the case, I will keep
the parts as movable... it depends on the figure... alot of times if you
exchange parts between figures the new parts will be slightly different as far
as length or the angle might be off... If that is the case, you have to cut
the new part and glue it on.. no big deal... but sometimes I have to put a
small screw in to secure the new part.. and that means filling the screw hole
and or gaps with putty (more on putty in the supplies list)
Sometimes in the case of heads, I have to put a wedge (a
piece of scrap plastic... usually a piece of an old pen or pen cap) between
the neck and the body to get the angle of the head right. kind of
like a washer cut in half... then glue it up..OF course its nice when you
don't have to go through all that, but whatever it takes.. right?
PAINTING BODY & PANT STRIPES:
I usually end up putting about 5 or 6 coats of paint on a
figure after touching up all my grimey fingerprints, and mistakes, and touch ups
and whatnot... I put a thin coat of paint on before I attach the head and
limbs.I try and put the paint on a little thicker on all the places where parts
will be attached ( like the collar area, the ends of the sleeves, etc...). and
let it dry completely.. then attach all the body parts ... I awlays screw
up the paint job when I reattach the body parts.. you might not have that
problem with acrilic paints but the testors paint does like to be handled or
touched at all for the first couple of days... anyway, after all parts are
reattached I go ahead and put on a nice coat of paint.. It cover easily because
I already have a undercoat.. and I dont have to cut in around the arms and head
because I already did that before they were put back on... anyway.. then
when that coat dries, I put on the decals.. and then touch it up again...
usually the last thing I paint are the shoes because I am always holding the
figure by the feet or using my thumb on his shoe to hold it on the field base
while I work on it
the other thing is the stripes on the pants...
could be just some glare, but it looks like you had a tough time painting a
straight edge... well, those stripes were a tough task because of the color
scheme.. there are two light colors (yellow &white) bordering the dark
green... Its hard because you have to make both sides of the green stripes
straight.. and there is a lot of contrast on both sides so every little flaw
shows up big time... If you were doing.. say, dark blue pants with red outer stripes
and a white inner stripe, it would have been easier.. First you paint the white
stripe-- making it wider than it needs to be.. you dont have to worry about the
edges at all.. just make sure there is white where white needs to be and feather
the edges so the paint is not clumped up at the edge... then you'd paint the red
outer stripe (after the white has dried)... you'd only have make sure that the
edge touching the white is straight.. again making it wider than it needs to be
and not worrying about the outside edge being straight.. just feathered... then
you'd do the blue.. once again you'd only have to worry about the edge
that is touching the red.. see what I mean??? You couldn't have really
done it that way on the bart starr because the yellow would have never covered
the green in one coat.. So here's a few tips for your situation:: make
sure the paint is thin enough to flow easily, but not too thin that it wont
cover.. make sure you have a new or good brush or you'll struggle every time
trying to use a frayed or old brush...try going faster when painting your
straight edges.. its easier to get a straight line when your going quickly
instead of trying to go slow and steady.. but your paint has got to flow or
going fast wont work... you need to load up the brush brush with a good
amount of paint so you have enough to paint the whole stripe in one swoop
(takes a little practice, but its not that hard once you get the hang of it)...
FACE & LIMBS:
For the faces, I try and match the closest match I
can find with the extra parts that I have, then repaint them as needed...
sometimes it works out better than other times.. I did a cris carter and used a
shaun alexander head.. I repainted the eyebrows so they would look look like
carters 'puppy dog' eyebrows... it came out looking just like carter... and I
did a robert smith that I used an emmitt smith face repainted with a lighter
skin tone and it looks almost exactly like robert smith.. sometimes the faces
work out great and sometimes they just sort of barely resemble the player.. What
I do is take about 10 or 15 figures (I buy them by the case) and disassemble
them all.. then when I think of a player I want to do, I pick the best suited parts
for that player.. obviously, it is easier when the pickings are deep, and by the
time I get down to only a few more raw figures, I have to let the parts
that I have dictate what players I can do or not do
As far as bending the arms and legs... Yeah, i do
that when I have to.. Like when I'm trying to recreate a certain pose... I bend
them a couple of different ways.. either by heating then up, bending them and
putting them in cold water (for slight changes)... or by cutting them (not all
the way through, just enough so they bend) at the joints and then
adding glue and/or putty... or sometimes I just cut off the hands or feet
or cut them off at the knees or elbows and then cut the angles and reglue
them. Its pretty tricky, though.. It s easy to screw them up...
HELMETS & FACEMASKS:
As for the facemasks... I solder any old style face masks
that I need... the main secret to soldering is in the materials.. regular
solder will only frustrate you... You need SILVER solder and most importantly
SILVER SOLDER FLUX. they are usually sold in a set.. a small tube of flux and
a coil of silver solder... the flux is liquid, not paste...It is available at
most hardware stores and sometimes wall mart.. with the silver solder and
silver solder flux, you can solder paperclips or just about any type of wire..
I like to use welding wire for a MIG welder for face masks.. but if you can
get away with using a stock facemask, you are better off.. but the two
bar facemasks that most retro figures use are not that hard to solder ....
like I said, paper clips work fine if you have the right kind of solder and
flux... first straighten the paper clip and then bend it into a "J"
shape... make 2 of those and then go from there.... you can use the long part
of the "J" for a handle while soldering and snip it off when your
done.. If you have no experience soldering, I don't know what to tell you..
some people make their masks by cutting or combining the stock facemasks...
sometimes that works fine,, sometimes not...
Additional (can also use): The custom facemasks are the wires used to hold the figures in the
clamshell.
When I make a custom Shield I use the plastic from one of the packages. I
just use an exacto knife and cut it to the correct size and then glue it to
the facemask.
For the helmets and facemask, testors gloss model paint is
probably the best paint to use ((NOT the acrylic{water-based} stuff))
it does come in spay cans.. in lots of pretty
colors.. so that might be an option besides getting an airbrush or trying to
brush on a smooth coat... I've never used it, so I can't vouch for it... but
its probably high quality paint...
DECALS (matching colors):
The away uniforms are usually easier... especially the decals... when
you do home (or dark) uniforms, you have to use white decal paper..
You make the numbers/letters white and use the uniform color as a background
(you have to match a computer color to a 'real' color... not easy.
because the color you see on your monitor is different than what is printed..
at least on my computer) I print out a swatch page with a bunch of
different colored squares (an assortment of each basic color and the
color ID #s underneath ...then pick the closest one and go from there...
and don't forget to scrape off the NFL logo on the back of the helmet...
no NFL logos before 1991, you know
keep in mind that, depending on the figure, applying
the decals on the sleeves can be almost as hard as painting them... but if
you pull it off it will come out looking better than you could possibly paint by
hand in a thousand years... sometimes you have put the sleeve decals on in two
or more pieces... and don't worry if the decals gets wrinkled... it will add to
the realism of the figure... usually... you have to remember that in real
life the material would wrinkle,,,
ANYTIME YOU PUT A DECAL OVER A DARKISH COLOR, IT MUST BE
ON WHITE PAPER... no matter what color the numbers are, if they are going over a
dark background, they must be on white paper.
Since you basically rule out option 1, that leaves the
latter two choices, (unless you don't mind the visible decal background)
Cutting out all the background color is the way to get the
absolute best looking decals.. On some decals it is no problem.. like for
instance most decals that are a uniform shape like a circle , triangle, square
etc... you just cut the decal out right up to the edges and have at it... no
problem... but when you are trying to do numbers that way.... BIG
problem!!! When you cut out the background on the numbers, it will cause
the decal to become too flimsy and next to impossible to apply... I
still do it that way , but usually end up ruining 2 or 3 before I get it on
right .. It s harder than hell, believe me...
So, what I sometimes do, and what I would suggest for you,
is kind of a combination of cutting out the whole background and touching up
the flaws with paint after the decal has been applied and set up.
cut out the decal all the way to the edges, but leave the
center (Like the middle of a "0" for instance), and leave the inner
area of a number (for instance on a "3", you would cut it out all
the way to the edge on three sides and then cut a straight line down, making a
rectangle-shaped decal.. ]see the carson palmer]))
On most of my customs, I cut out the entire colored
background on the large numbers.. even the middle area... So they would look
like the sew on numbers you would put on a real jersey... But It is extrememly
difficult and I would recommend it (you might try it out, though.. ) I
use small sharp scissors for the outside edges and a razor knife for the
inside areas.....
But do it the way I mentioned earlier.. cutting most, but
not all of the excess off.. then carefully touch up what you can after the
decal has set up and dried...
a few other hints.. soak the decals for NO LONGER THAT 5 TO
10 SECONDS in cold water.. then put it on a paper towel while you put a coat
of decal set ( I hope you have some) on the surafce to be decaled, and then a
coat on the decal itself,. By that time ((about 10 to 15 seconds) the decal
should easily slide off of the paper, but not be too flimsy too work with...
But if you do not get it on right at first, the more you screw around trying
to get it in the right place, and without any wrinkles or bubbles, the
flimslier the decal gets and soon will become too thrashed to use... You
have got to get it right within the first 15 or 20 seconds or you willprobably
wind up screwing it up and having to try another one... PRINT AT LEAST 6 OR 7
EXTRAS...
I use a small paint brush to apply the decals.. I can move
it, and smooth it, and put on the decal set with the brush... And when its is
finally in place, carefully and gently blott it down with a paper towel....
when the excess water is soaked up, the decal will become bonded to
the surface and you should be able to press it and wipe it with a paper towel
with out disturbing the decal...but be careful, nothings worse than finally
getting a decal on after 5 or 6 attempts, only to ruin it by wiping it down
with a towel.. been there, done that.. sucks
USING EPOXOLITE:
1) mix it up in equal amounts
2) with a toothpick, slop it on where you want it.. dont
worry a whole lot about how it looks yet.. its hard to work with at his point
because it is too wet and sticky
3) wait about 20 minutes.. then with a small trowel of some
sort (i use a 1/2 inch strip cut out of a credit card) smooth it out using a
dish of water -- dip the trowel in the water to moisten and make the stuff
easier to work with.. it should still really moist without the water at this
point and easy to manipulate as it has had a chance to set up a bit.. just try
and even it out and form it into the shape you want... you should have at
least a half hour to an hour to work with it before it sets up too much...
4) after about 2 hours (it should be pretty stiff..
almost dried, but still wet enough so you can easily put a groove or dent in
it with a toothpick.) take a small paint brush and a toothpick-like tool
and form the wrinkles then paint water on it to really smooth it out nicely...
5) If this all works out, there should be little sanding
afterwards.. a little sanding is usually nessacary.. but the stuff sets up
really hard when its cured and it is not very easy to sand...
ODDS & ENDS:
I do have a little box with all kinds of scrap plastic and
little odds and ends that I use for all sorts of things like that.. I use
pieces of those little plastic zip-ties for things like glove straps or
elbow pad straps... I use pieces of a credit card for things like elbow
pads.. I use that teflon plumber's tape for ace bandages.. pieces of thread
coated with krazy glue for shoelaces.. you gotta use your imagination..
and use what is available... check out this carson palmer.. http://cosmicwaste.com/images/xxxcustoms/CARSON%20PALMER%20COLLAGEjpg
I used the cap of a magic marker cut with a razor blade for the knee brace..
with pieces of a rubber band for the straps,, the mouthpiece is just a sliver
of yellow plastic from the cap to a spray can.. the hip pads are just pieces
of a credit card cut out w/ scissors and sanded.. same thing with this
joey browner http://cosmicwaste.com/images/xxxcustoms/browner1.jpg
the elbow pads are pieces of a credit card that I cut
out and then barely heat them up with a lighter until the are soft enought to
bend and form (about 3 or 4 seconds about 4 inches over the flame) then pieces
of a rubber band for the straps.. the gloves are just bare hands painted like
a glove and I used a little piece of a zip-tie for the glove strap (I
coiled up a zip-tie into a tight spring-like coil, heated it up with a lighter
and put it in cold water.. that makes it stay coiled and I was able to cut out
pieces that were already formed to fit around his wrist and could be easily
glued.. the ridges in the zip-tie look great for straps and the factory
rounded end of a zip tie look perfect for the tip of the strap.. if the pic
was bigger you could see it..
DIRT & GRASS:
the way I do it is a technique called 'dry brushing'...
I use a old oil painting brush (it has short, stuff bristles)... take a little
yellow, a little brown, a little green.. and put a few drops of each on a
piece of cardboard or a table or whatever... mix a few different 'dirt' colors
from the three colors... I put a few drops of each color on a card.. then
just kinda mix the colors, so theres about four or five shades of dirt...
then wipe the paint off the brush with a paper towel and kind of dab the dry
brush where you want the dirt... remember to wipe off the brush every time you
dip into some paint....you should have practically no paint on the brush..
experiment on a similar surface first... its easy to screw up your figure by
putting on too much dirt or fake looking dirt... I tried using an airbrush.
but dry-brushing looks better and is way easier..(I hate cleaning my
airbrush)... hint: a little tiny bit of dirt goes along way....
it does not take much dirt to make a dirty figure... a little on the shoes and
socks.. a little on the knees a little smear of mud on his ass and maybe one
place on the jersey will be more than enough to give the impression...
sometimes a little 'blood' looks cool... but just a tiny amount http://cosmicwaste.com/images/xxxcustoms/mcmahon%20millard%201.jpg